In this Power BI blog, we will be talking about how you can share datasets, reports, dashboards and collaborate with your colleagues and partners. There are basically two ways of sharing stuff in power BI:
- Sharing an object through share option in Navigation Pane.
- Sharing through Organizational Content Pack.
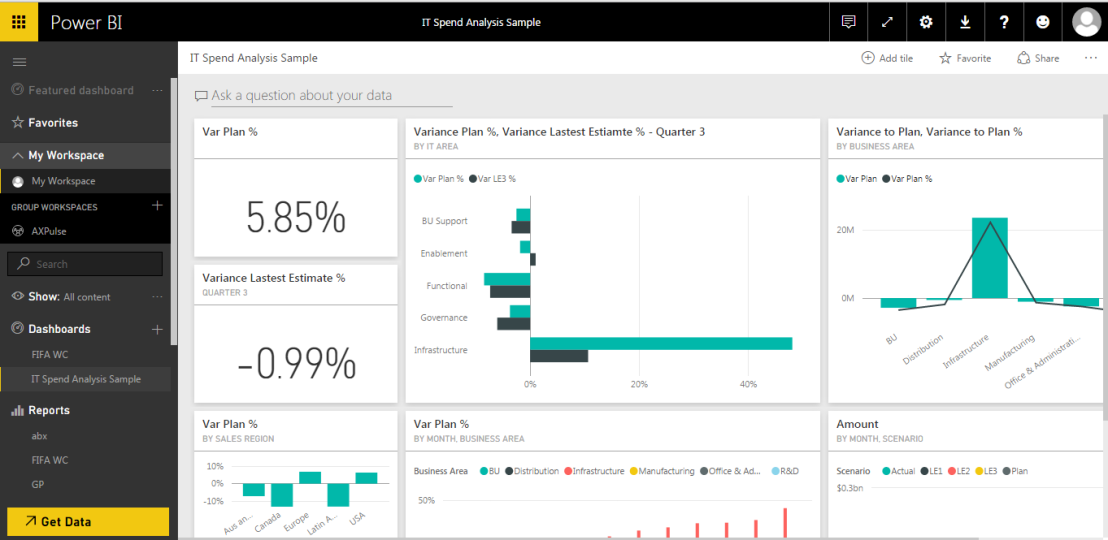
We will be discussing both. In this example, I am going to share an IT Analysis Sample within a group which I will create for my organization i.e. AXPulse.
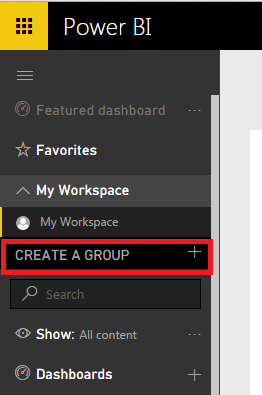
To share our stuff, we need to create a Group first, so, once you have accessed the Power BI portal, you can see an area in the Navigation Pane that refers to the Groups the current user has created.
Now, to create a new Group lets click on the Create New Group option available below Work spaces.
Once you click the Create Group option, a Dialog will open up that will ask a few basic questions about its name, the type of Group that you want to create as well as the Users that will be included in the Group, users can be added based on their email addresses.

Once you have defined all the users that you want to share with, it will ask about the accessibility level of the Group Members i.e. you can define a user to have Admin rights over the Group. There are other options as well that define if a user has the rights to edit the content or is he just allowed to view the reports.

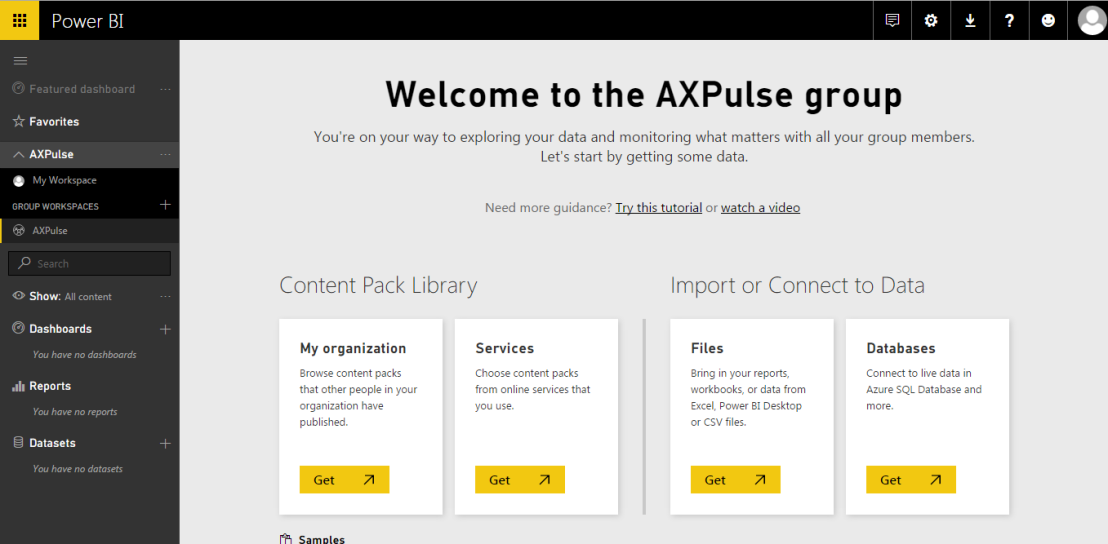
After you hit Save, the group is created and it will take you to the Home Page for that Group Workspace, my Group’s name is AXPulse you can name it whatever you want. As you can see currently there are no datasets, reports or dashboards shared with the Group, so let’s start sharing.
1 – Sharing a particular object through share option in Navigation Pane :
Let’s go back to our Workspace, navigate to the Dashboards, click on the three dots that show up with our IT Analysis Sample Dashboard, it will show various options, one of which allows us to share the dashboard, go ahead and click the Share button.

For demo purpose, I am sharing the dashboard with myself, once I have filled up all the information, it will send an email to the recipient to with the Dashboard needs to be shared.

Now the user to whom the Dashboard is shared can easily view the Dashboard that we shared with him, he can also navigate to it by just clicking the link provided in the Email that is sent by Microsoft Power BI, this is the first scenario of sharing and collaboration in Power BI.

2 – Sharing through Organizational Content Pack :
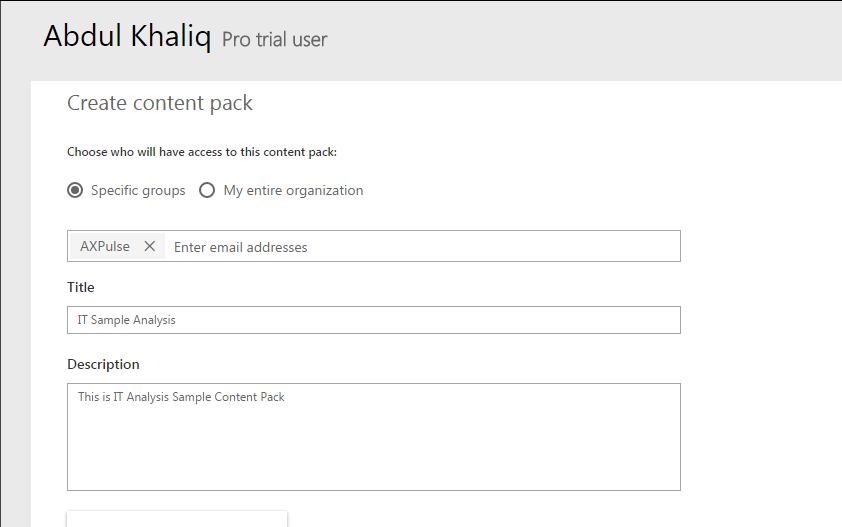
Now, moving on to the second way of sharing which is through creation of an Organizational Content Pack. To create a content pack, click on the settings tab located on top right beside the notifications tab. Once you click the create content pack button, it will open a page which will ask about the basic description of the content pack i.e. name, description, etc. In my scenario, I want to create the content pack that will access of every person included in the Group that I created earlier named ‘AXPulse’.
After entering the basic info, it will also ask you to enter the items that you want to share/publish to the Group, one thing that needs to be mentioned here is that if you select a Dashboard to be published, it will automatically select its corresponding reports and datasets. After the information is entered, click Publish.

After the content pack is created, a notification will be sent to all the users in the Organisational Group.

Now, when you try to ‘Get Data’ from Organisational Content Pack, it will show you the recently created content pack that I created for my Organisational Group.

If you get the Content Pack, it will automatically add the stuff included in that content pack to your workspace.

These are the two ways of Sharing in Power BI, that is all from our today’s topic “Sharing and Collaboration in Power BI”. Thanks

One thought on “Sharing and Collaboration in Power BI”